Creating an Angle from the Object List
There are multiple ways to create an Angle (see: Creating an Angle ).
On the Search results page, click
 . A dialog box opens.
Click Continue next to Expert: Select an object from the Object List to open the Object List. Alternatively, click on the image next to the title to open the Object List.
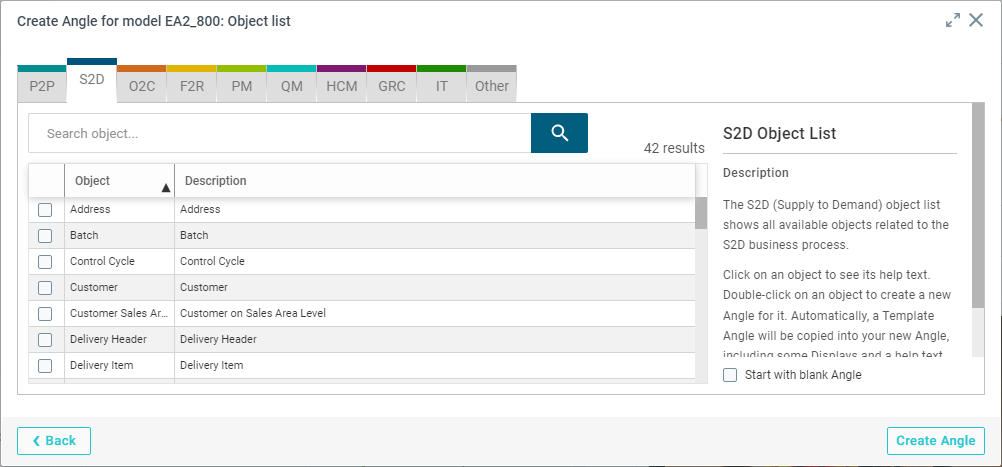
Select the business process tabs that are relevant to your business question (see Business processes).
Select a business process tab to view its description and the corresponding objects included in it.
Select an item on the Other tab, if it is not part of the available Business Processes. You can link it to a business process of your choice while saving the Angle.
Select a start object in the list or use the Search field.
You can select multiple objects as the starting point for your Angle. Keep in mind that this might lead to unwanted results.
You can create an Angle that is not based on data that has been linked to an object by selecting Start with blank Angle. For example: selecting object Delivery Header and Start with blank Angle creates an Angle with only two columns: the ID and the object Delivery Header.
Click Create Angle. A new Angle is created based on the object you selected.
If you have selected Start with blank Angle in the previous step, no business process is selected for the new Angle.
You can customize the following Angle characteristics:
Note
You must select at least one Business process before you can save the Angle.
Click Save. The Angle is saved as a private Angle.